and select Edit Label Sets.
Color labels are useful for naming and quickly identifying your processing plans for your images. Different colors can be used to represent different stages of your workflow. For example, as you review your photos you can quickly label files to upload, print, reject, review, or sharpen, or any other term that matches your workflow needs. Once your files have been labeled, you can click a color label in the Catalog pane to instantly display all of the files assigned to that label.
You can also use color labels in combination with the Group by, or Filter By features to refine your list. Color labels, like tagging, categories, and ratings, are a way to set aside, organize, and group your photos without moving them into different folders.
If the Properties pane or Catalog pane is not visible in Manage mode, click View | Properties or View | Catalog.
Begin by creating a label set so you can quickly select and assign specified labels. Once you have a label set in place, you can assign your images to the appropriate labels corresponding to your workflow.
To Create a Color Label Set:
and select Edit Label Sets.Once you have created color label sets, you can access them from the Catalog pane by clicking the Labels settings button and selecting from the drop-down list. Before assigning a color label, make sure the intended label set is active. The active label set name is shown in brackets in the label header.
ACDSee uses XMP to embed ACDSee Metadata into each file. Only some file formats and file extensions support XMP. These include GIF, JPEG, DNG, PNG, PSD, and TIF. In the case of these file formats, the ACDSee Metadata is embedded inside the file and so you can rename or move the file outside of ACDSee and still be able to retrieve the ACDSee Metadata. For formats that currently do not support XMP, including RAW and ABR, the ACDSee Metadata is written to a sidecar file that is stored in the same folder as its file. Because a sidecar file is separate from the file itself, you need to rename or move them together, or you could lose the ACDSee Metadata permanently.
You can also set labels from the status bar in View, Develop, and Edit mode.
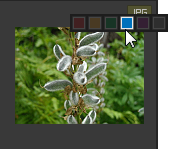
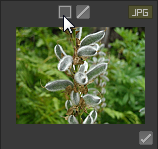
To Assign a Color Label Using the Label Line Hover Icon in Thumbnail View:
1.
2.
3.
Use the overlay icon on one of a number of selected images to assign the label to all.
To Assign a Color Label to a File Using the Catalog Pane:
To Assign Files to Color Labels in the Properties Pane:
To Assign Color Labels Using the Edit Menu in Manage and View Mode:
To Assign Color Labels with the Context Menu:
To Assign Color Labels Using Keyboard Shortcuts:

|
Alt-1 Alt-2 Alt-3 Alt-4 Alt-5 Alt-0 |
|
To Search All Images in the Database Assigned to a Label:
To Search All Images in the File List Assigned to a Label:
Click the Filter drop-down above the File List pane and select a label name. All files assigned to that label in the current file list will be selected.
To Select All Images in the File List Assigned to a Label:
Use Alt-1 through Alt-5 for the five colors, plus Alt-0 to clear the label (exactly the same as ratings, except it uses Alt instead of Ctrl
To Remove a Color Label from a File:
To Delete a Label Set: